Easy way to get the 10px gutter
Description:
One of the many way to ensure a 10px gutter around your logos.
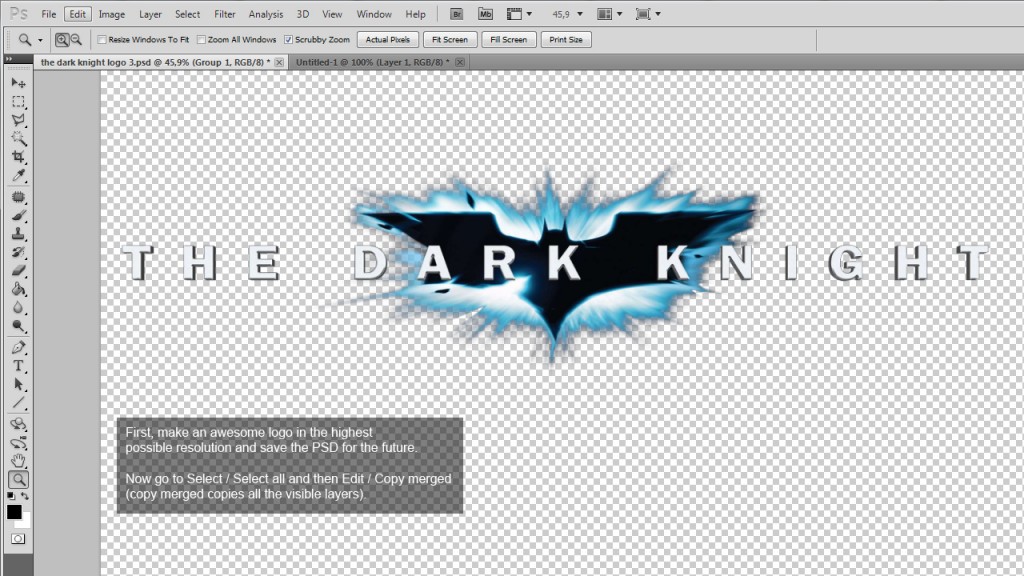
First, make an awesome logo in the highest possible resolution and save the PSD for the future. Now go to Select / Select all and then Edit / Copy merged (copy merged copies all the visible layers).
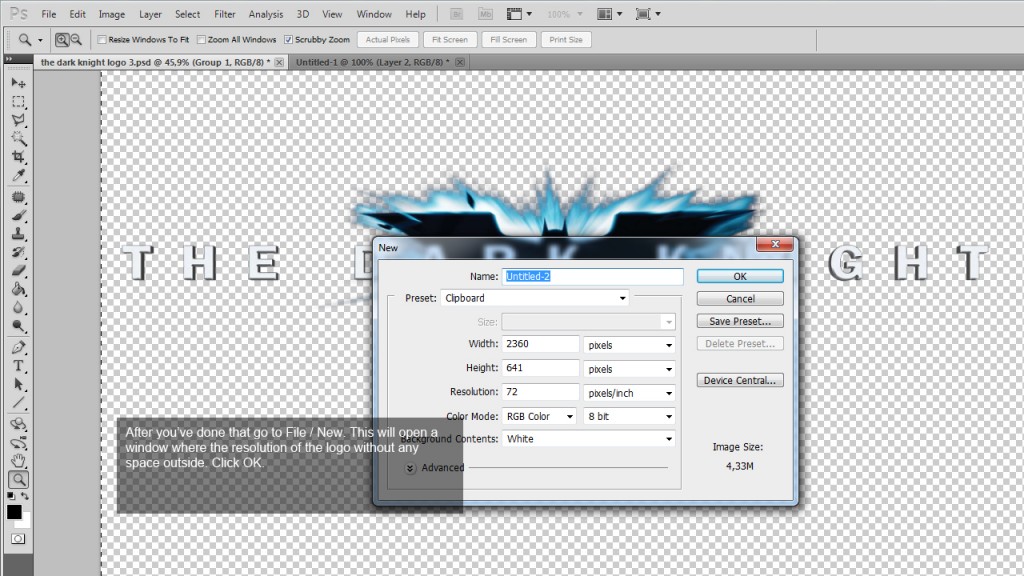
After you’ve done that go to File / New. This will open a window where the resolution of the logo without any space outside. Click OK.
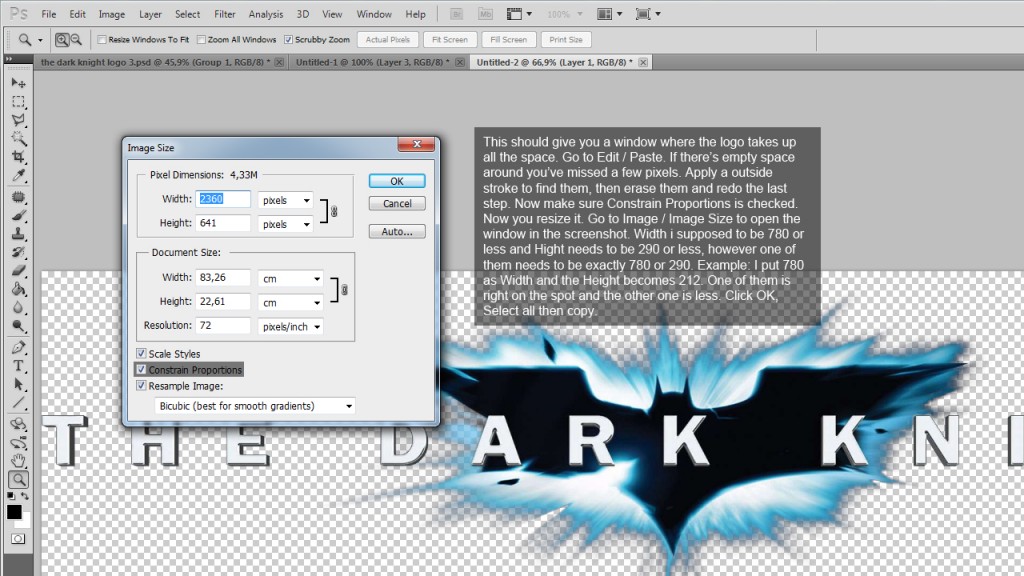
This should give you a window where the logo takes up all the space. Go to Edit / Paste. If there’s empty space around you’ve missed a few pixels. Apply a outside stroke to find them, then erase them and redo the last step. Now make sure Constrain Proportions is checked. Now you resize it. Go to Image / Image Size to open the window in the screenshot. Width i supposed to be 780 or less and Hight needs to be 290 or less, however one of them needs to be exactly 780 or 290. Example: I put 780 as Width and the Height becomes 212. One of them is right on the spot and the other one is less. Click OK, Select all then copy.

Create a new image. Input W = 800px and H = 310px and paste. This should give you a 10 px gutter. The image automatically center allignes so now you can save and upload it. Don’t forget to hide the white background first though.
Comments are closed.