Create a cdArt with GIMP (Outdated – 1000 point bounty for updated tutorial)
Published by: @Martijn - February 25, 2012
Click to like You have already voted.

Description: How to create discART using a Gimp Template.
Step 1
-
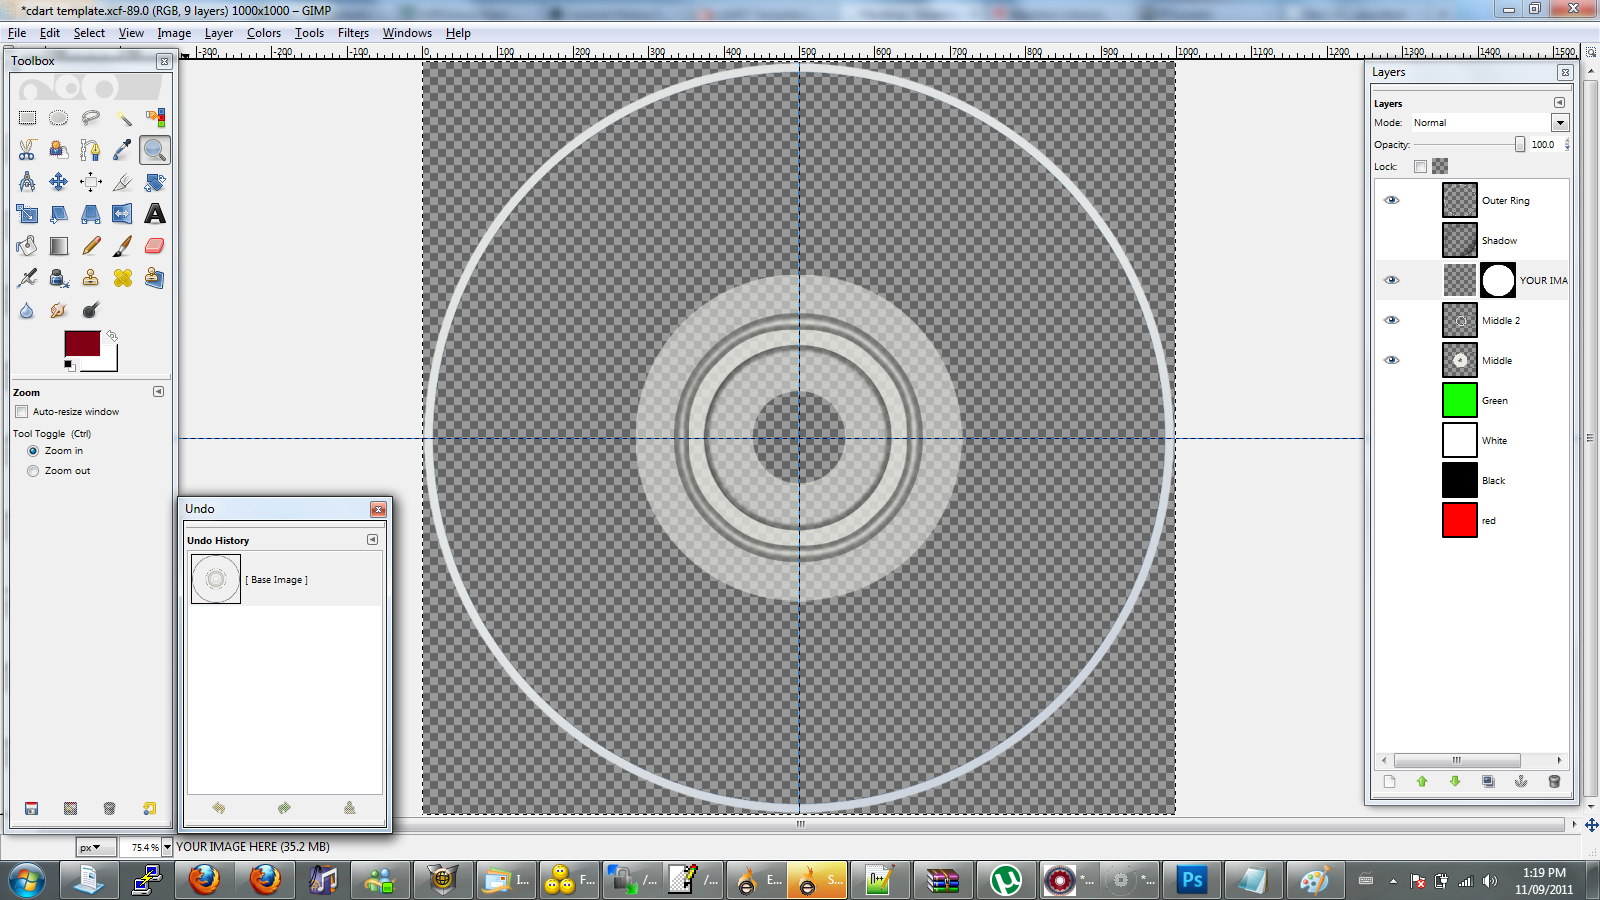
- Open up the cdART template in GIMP
Step 2
-
- Make sure that the correct layer is selected, to do this click on the layer with the red square
-
- Open the CD label image. This will open another window containing the CD label
-
- Select the complete CD label(Ctrl A) and copy image (Ctrl C)
Step 3

-
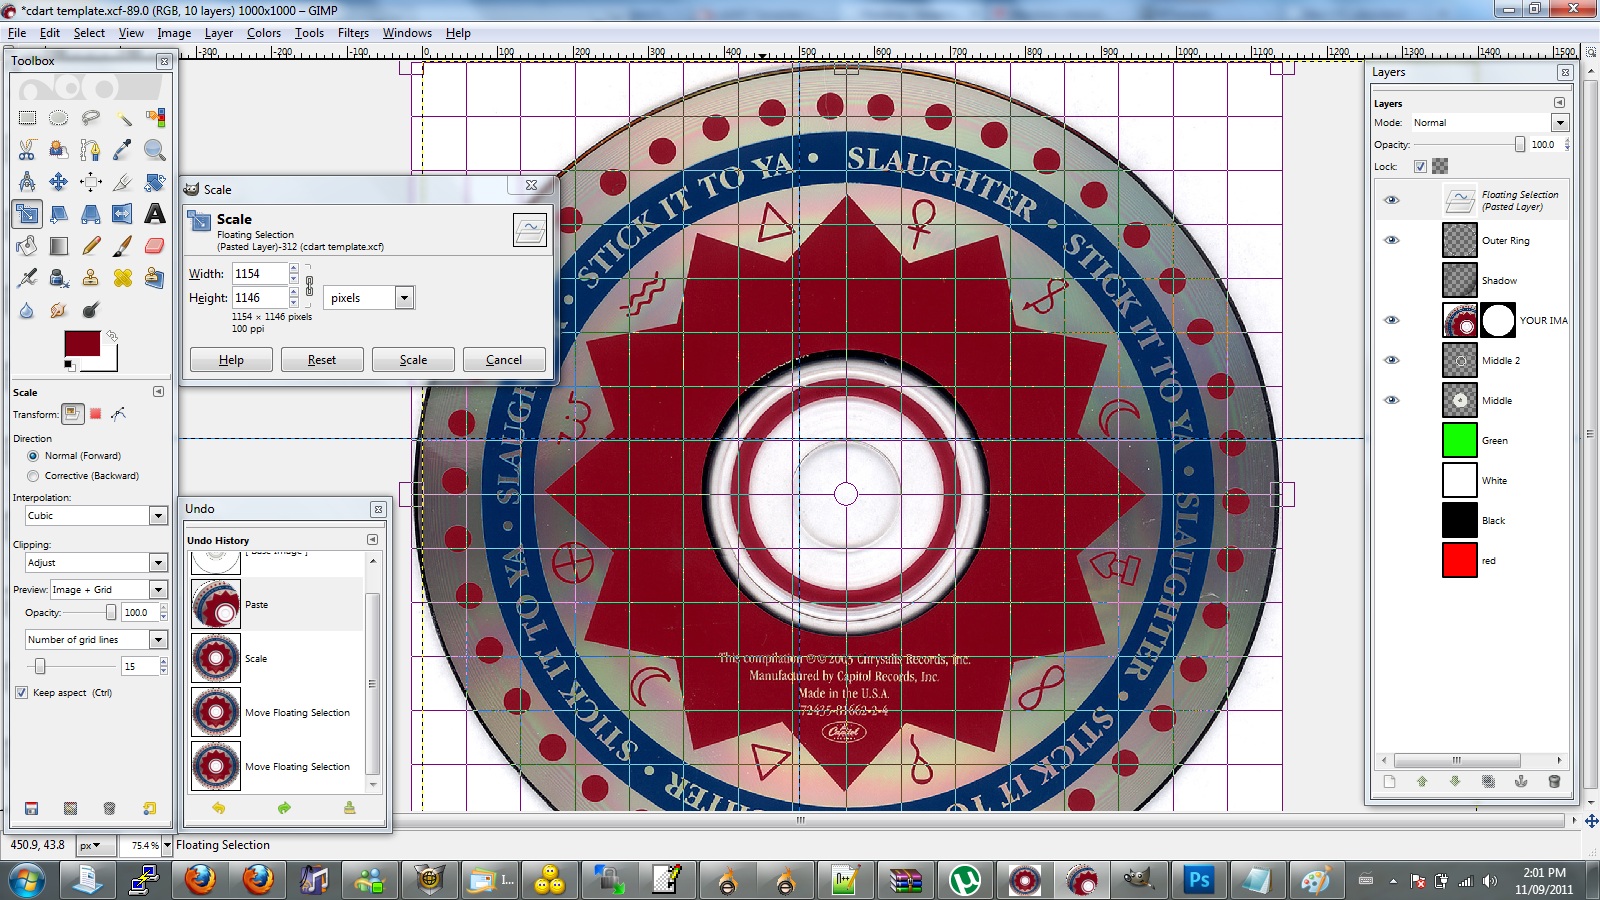
- Now paste the image onto the template (Ctrl V). The pasted image will become a new layer call ‘Floating Selection’ which allows the image to be manipulated(i.e. scaling and positioning) without affecting the final result
Step 4

-
- Now it is time to scale the image. Choose Scale from Tools -> Transform Tools -> Scale(or press Shift T). Make sure that the chain is not broken in the scale window by clicking on it(this is the Keep Aspect option). Click anywhere on the grid pattern and drag towards the center. When the size is appropriate click on the Scale button. *Note* this can take a little trial and error until it is the proper size. Also some scanners/images do not have a perfect aspect ratio, turning off the Keep Aspect Ratio(the chain) you can fine tune the image
Step 5
-
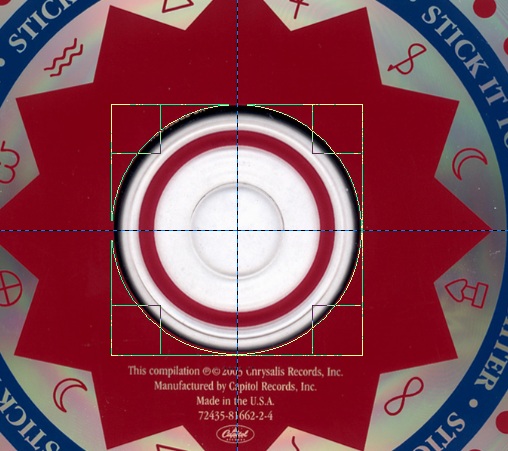
- If the image is not centered, select the Move Tool(M) and position the image *note* you can use the directional arrows on the keyboard to make fine adjustments
Step 6

-
- Now with the image scaled and centered, click on the Anchor icon on the Layer Window. This locks all the changes and the cd label image into the template
Step 7
-
- **Skip this step if you are not dealing with a cd with a split ring** Duplicate this layer and select the layer that is higher on Layer list
-
- Now for the center ring. In the Layers window, you will see the cdART image with an image of a white circle beside it. This ‘circle’ image is a layer mask. This is how the round image of the cd is created by masking out what we want to keep. The white colour is what we want to keep and the black is what we do not want. Click on this image
-
- Select the Ellipse Select Tool(E). Make sure the setting are the following:
-
- Antialiasing checked
-
- Feather edges unchecked
-
- Expand from Center checked
-
- Fixed checked, Aspect Ratio selected and 1:1 as the ratio.
-
- Click at the center and drag outward until all of the center ring is contained in the selection, then release
-
- With the center ring selected, click on the Bucket Fill Tool(Shift B), make sure the foreground is set to black(easiest way is to click on the little black and white squares). Now click(with the Bucket tool) anywhere in the selected area(center ring) You will notice that this part of the image will now disappear(leaving the other layers to show through. If this is not a split ring, continue on with step 8

-
- Change the foreground colour to white
-
- Select the Ellipse Select Tool(E) again, the settings should have not changed from the last time it was used(in 10a). Click at the center and drag outward until the inside edge of the split ring is reached. Now use the Bucket Fill Tool(Shift B) to fill the selected area with white

- Select the Ellipse Select Tool(E) again, the settings should have not changed from the last time it was used(in 10a). Click at the center and drag outward until the inside edge of the split ring is reached. Now use the Bucket Fill Tool(Shift B) to fill the selected area with white
-
- Change the foreground colour to black
-
- Once again, select the Ellipse Select Tool(E). Click at the center and drag outward until the all of the center transparent part of the cd is reached. Now use the Bucket Fill Tool(Shift B) to fill the selected area with black

- Once again, select the Ellipse Select Tool(E). Click at the center and drag outward until the all of the center transparent part of the cd is reached. Now use the Bucket Fill Tool(Shift B) to fill the selected area with black
-
- Now you should be done masking out the split ring. The layer window should look something like the following image. Click the ‘eye’ on the lower layer. This will turn the layer’s visibility on and off. If you are satisfied with the outcome, you can delete this layer.

Step 8
-
- You may notice some layers that are coloured(green, white, black and red) these can be turned on and off by click on where the eye would be. This allows you to check to make sure all that should be transparent is transparent. Make sure all these layers are not visible when continuing on to next step
Step 9
-
- Right click on layer labelled ‘YOUR IMAGE HERE’ and select ‘Apply Layer Mask’ from the drop down menu. Almost done
Step 10

-
- Select the complete image(Ctrl A) and from Tools -> Color Tools -> Posterize. This allows you to adjust the number of colours used in the image, ultimately reducing the size of the image. Adjust the level as low as possible, while keeping the image properly coloured
Step 11
-
- Now the image can be saved. From File, select ‘Export As’. In ‘Name’ enter the file name, then select the file type (PNG). Click Save. A pop up will show asking to either Flatten Image or Merge Visible Layers, Select Merge Visible Layers and click Export. Another menu will pop up (Save as PNG) I believe the Defaults can be used(see image)
Step 12
-
- Now you are ready to upload. But first Go to http://www.smushit.com/ysmush.it/ and upload the image or images if you have done a batch, download the smushed images and replace your old image. If the file sizes is still above 620kb(the limit on fanart.tv, then you will need to go back and adjust the posterize level to get the size smaller. With the file smaller than 620kb you can now upload them on http://fanart.tv/
Comments are closed.